


TED# 028: Introduction to Macros in Excel
Learn about macros and record your first one with this step by step guide.


Don’t forget to download the sample data at the end of the lesson so you can practice along!
When it comes to Excel, being able to utilize macros to create automation is a skill that can really separate you from your peers. I personally experienced a rapid growth in my career because of my ability to automate reports that took my predecessors hours to produce.
You don't need to be a tech wizard to get started with VBA. I find that most folks are often amazed at how a few lines of code can drastically enhance their work efficiency. I personally have seen macros reduce work times from several hours to just a few minutes. By taking the first step and jumping in you'll unlock a new level of productivity you never thought possible.
What is VBA?
Visual Basic for Applications (VBA) is a powerful programming language built into most Microsoft Office applications, including Excel. It is essentially the engine under the hood that lets you automate routine tasks, analyze and manipulate data, and create more complex Excel spreadsheets. It is a helpful tool that enables you to do more with less effort. It is especially helpful to those who constantly engage in repetitive tasks or handle large amounts of data.
We use VBA to write Macros. A Macro is a series of instructions or actions that your computer can perform automatically at your command. Think of it as a mini program you create to do repetitive tasks quickly and efficiently.
Getting Started
Before we dive into writing a Macro we will need to setup the Excel environment to allow us to use VBA to write Macros. We do this by activating the Developer tab. Follow these steps:
Step 1: Right Click on the Ribbon and select Customize.

Step 2: Go to Customize Ribbon and then check Developer. Click OK

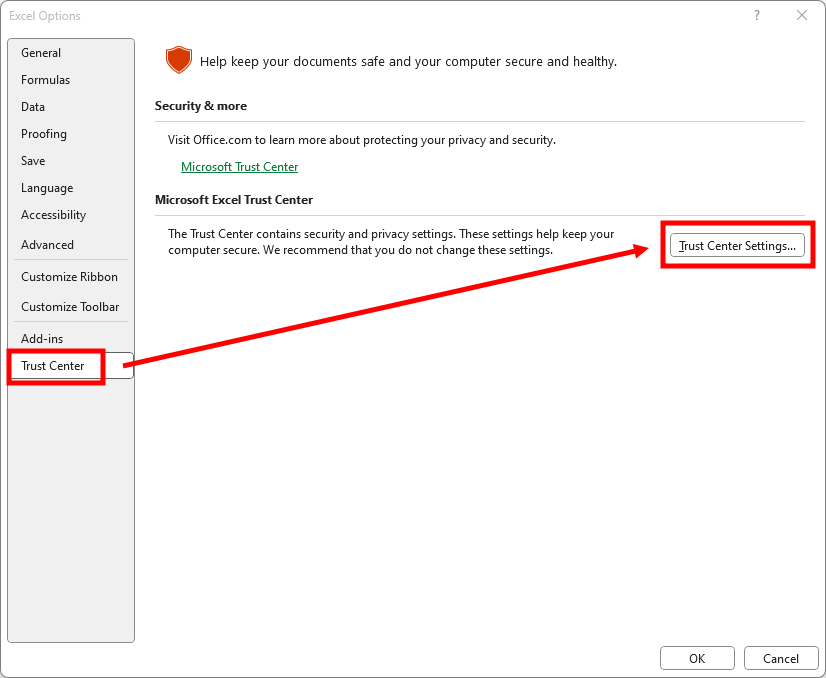
Step 3: Next we want to enable Macros to execute in Excel. Go to File > Options. Then in the menu you will want to go to Trust Center > Trust Center Settings
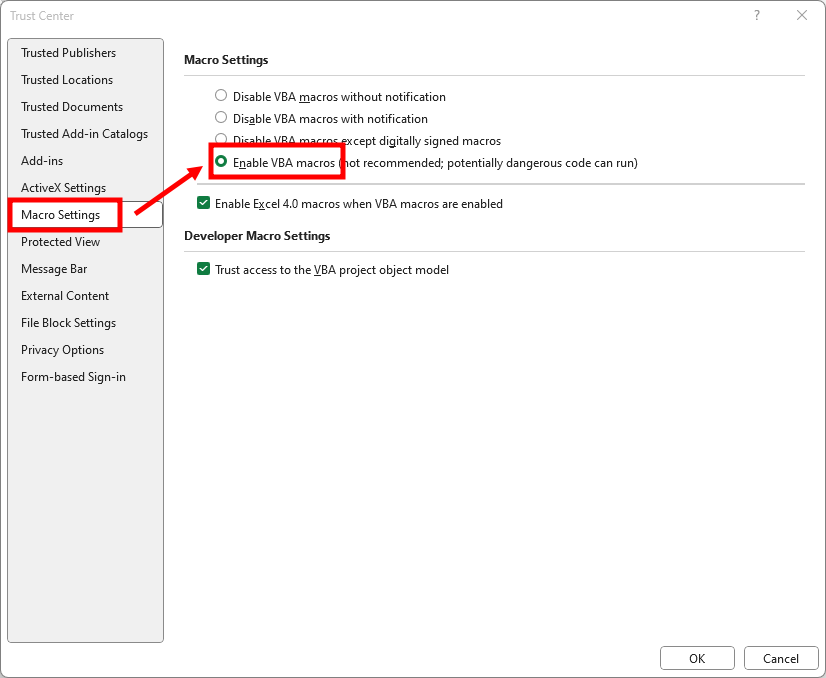
Step 4: Inside of Trust Center Settings go to Macro Settings. Then click on “Enable VBA Macros”.
Step 5: Save your workbook as an Excel Enabled Workbook. You can do this by simply going to Save As and saving it as a .xlsm file.

Your First Macro
Excel has a really great feature to get your macro experience started. Known as the “Record Macro” feature, it allows you to simply record the steps you are taking. Excel will write the code using VBA in the background. Recording a macro is a great first step in learning to automate. Let’s dive into an example.
In this example we have some CSV data that is 1 of many that we have to get formatted correctly in the course of a day. It takes us quite a bit of time to do this over and over again. It’s boring and tedious.

Lets turn the tedious work into a macro.
Step 1: Go to the Developer Tab and click Record Macro
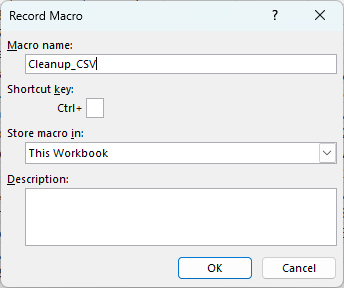
Step 2: Name the Macro & hit OK. Note: You cannot have any spaces between characters. Utilize a “_” between words if needed. I will name this Macro “Cleanup_CSV”.
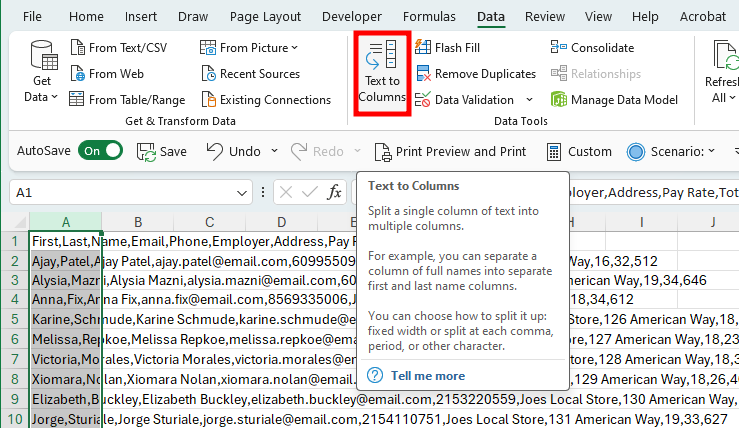
Step 3: First I’ll be using Text to Columns to break up the data. I don’t have to do anything but execute that command.
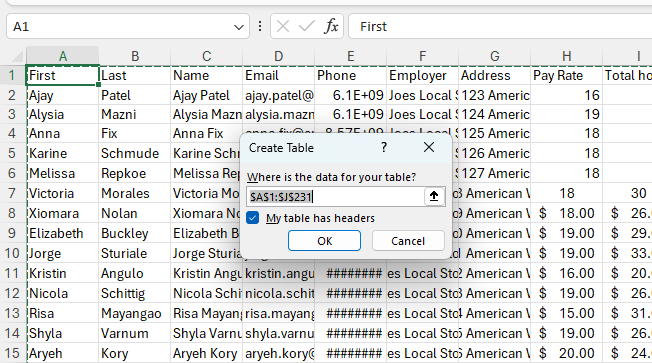
Step 4: The data is now separated. I will now apply a table formatting to the data using CTRL + T. Again, the Record Macro Feature is tracking all of this.
Step 5: I want to adjust some formatting now. I’ll use auto-width to properly size the width of my cells. I will also properly format the phone numbers, pay rate, etc. How I want to see them.

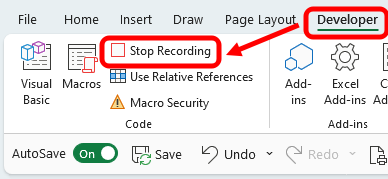
Step 6: Stop Recording the Macro. Go to Developer and then click on Stop Recording
Congrats! You have recorded the Macro. Next it is time to use it. To do this we simply grab another set of data (I have provided multiple copies of data for you in the practice sample.)
Step 7: Open new data in the SAME SHEET. The Macros live inside each sheet. To use them you will want to put your data into the sheet where the macros “live”.
Step 8: To run the Macro go to Developer > Macros. Then select the Macro from the list and click on Run.

Here it is in action:
And just like that you have reduced your work time for this task into just a few seconds! This is just a simple example, and over time the amount of time saved is tremendous. Once you start using Macros to automate yours tasks you will unlock more time to do more valuable tasks…and in less time!
Thanks for reading this lesson on VBA & Macros. Make sure that you practice using these features. This is easy to do - just download the sample data set right here:
Note: You will have to save the document as a .xlsm in order to run the macro once you record it.
And remember, apply what you have learned and it will stay with you much longer.
There are a few other ways I can help you master Excel:
Do you have any burning questions about Excel that you want answered? Send your question to hello@learnexcel.live. I will address it in a future newsletter.
Do you or your organization need a little spreadsheet help? Book a 1 on 1 with me here.
Want to learn more Excel Shortcuts? I have created something special (and free) for you: The Best Damn Excel Shortcut Sheet
Til next time ✌️
-Ajay
The Excel Ninja 🥷
PS - If you like these lessons please share with a friend or two...
I think they both have their place. In my opinion you could even layer DAF's into the conversation. From my perspective they all contribute to making data and number crunching much easier and efficient.
Do you like macros over powerquery?